There are two methods to create a Block within the system. It is important to note that regardless of whether the Block is assigned to a Bank worker or an Agency worker, the creation process remains the same. Similar to Ad Hoc shifts, Blocks are initially generated as Bank Blocks and then forwarded to the agency.
Creating Block from Scratch
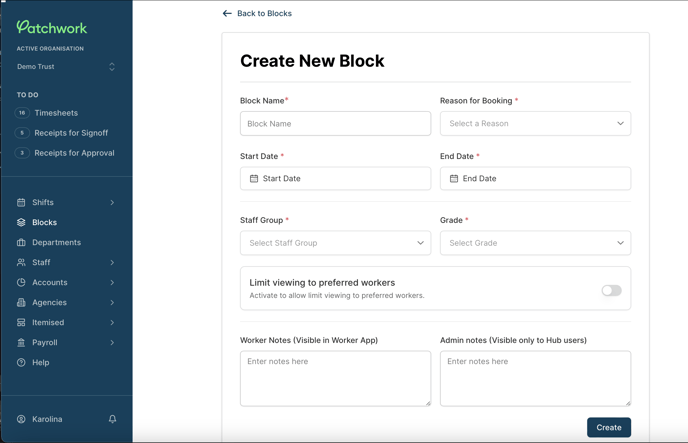
This method is often the preferred way to create a Block, as it allows for the quick generation of a large number of shifts in a short period. To begin, navigate to the Blocks page (not the shifts page) and initiate the process by clicking on the ‘Create Block’ button in the top right hand corner.
Upon clicking the 'Create Block' button, a window will appear, prompting you to input various details. This process will be familiar, as it involves providing information similar to what is required when creating a Shift. Additionally, you will be asked to specify the Start Date and End Date, which are specific to the entire Block.
After entering the information, a blank calendar will appear for the Block dates you have just input. From here, you can begin creating shifts by hovering over the empty days and clicking to open the 'Add Shift' window.
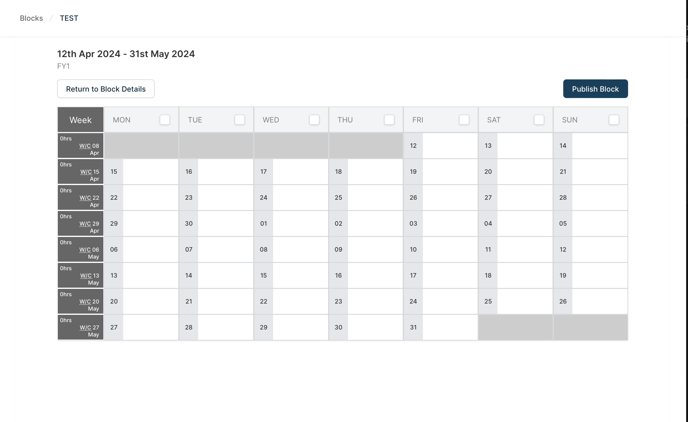
A notable feature in creating Blocks is the inclusion of a 'Frequency' option. This function allows you to establish a recurring schedule for the shift. You can set it to repeat daily, on specific days of the week, or on the same day each week. Furthermore, you have the flexibility to determine when this pattern should conclude or opt for it to repeat until the Block's end.
Draft Blocks
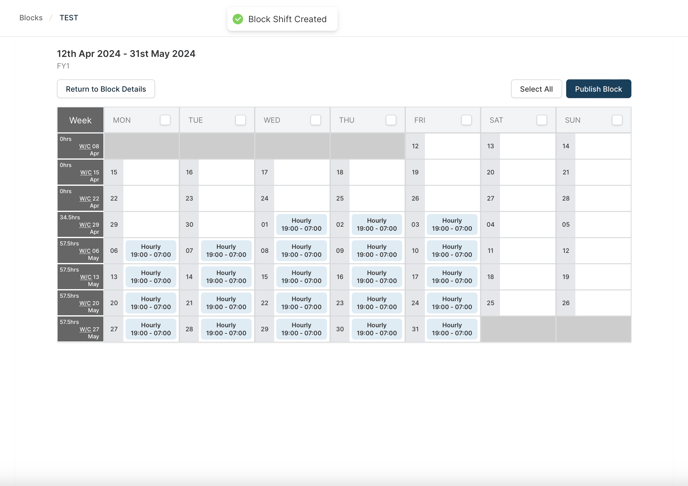
After filling the Block with shifts, its default status is 'Draft'. This allows you to make changes easily without any immediate impact. Draft shifts are not visible to workers, giving you the flexibility to adjust them as needed.
Once you are satisfied with the shifts, you will need to click on the 'Publish Block' button located in the top right corner of the calendar page. Only authorized users with the 'Can Publish Blocks' permission can perform this action.
Once the Block is published, it will become visible to workers.
Grouping Shifts Together
The other method of creating a Block is by simply grouping 2 or more existing shifts together.
From the Shift page, you can create a Block by selecting multiple shifts that share the same Staff Group, Grade, Status (e.g. available/booked), and Type (e.g. bank/agency).
Once selected, you’ll see a ‘Create new Block’ button in the toolbar at the bottom of the page. Clicking this will prompt the user to complete a Block Name. This will be stored along with a Block ID for reporting and search purposes.
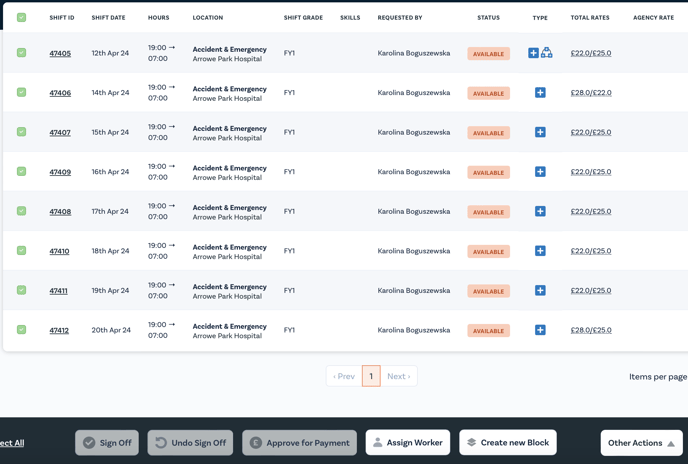
Once you click ‘Create Block’, this Block will be generated and visible in the ‘Blocks’ page. Note, the shifts used to create that Block will now disappear from the Shift page unless the ‘Show Block Shifts’ toggle is switched on.
Using a similar approach, you can also add or remove shifts to a Block. If you select a shift within a Block, you will then have the options to ‘Remove from Block’. This will turn it back into an Ad Hoc Shift.
If you choose a Shift that is not part of a Block, you will have the option to 'Add to Existing Block'. By selecting this option, a list of suitable Blocks (those containing similar shifts) will be presented for you to choose from.